Start or Stop services in multiple Windows EC2 Instances using AWS Systems Manager
Use Case
You are the admin over a large amount of EC2 instances and managing different AWS accounts under Organization and you have to start/stop/disable a service for all Windows EC2 Instances in the Organization. Rather than wasting labor hours to perform this activity in each instance manually, you want to automate the process using AWS Systems Manager. Recently Windows had a flaw in Print Spooler Remote Code Execution Vulnerability and Microsoft recommended to stop until the patch is applied, in order to apply this immediately, we can make use of this designSystems Manager
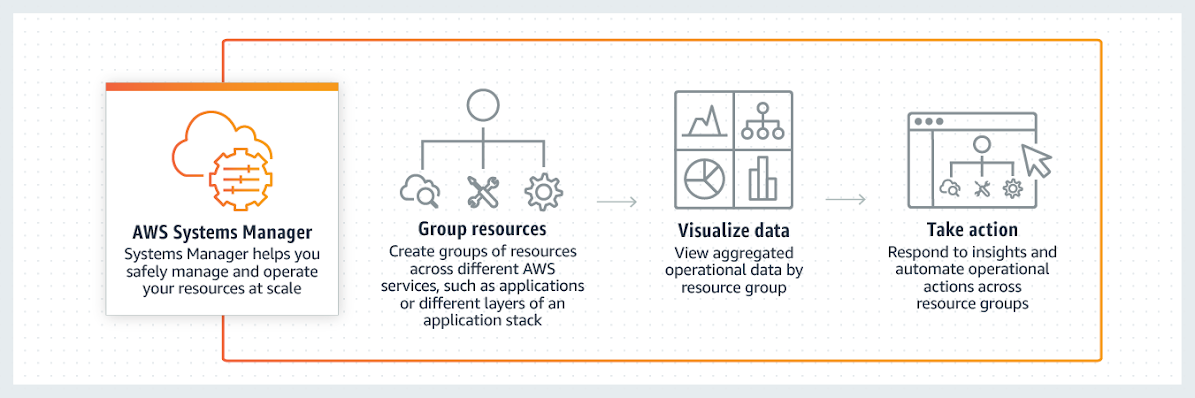
Systems Manager (SSM) gives you visibility and control over your AWS infrastructure. Automation, a capability of AWS Systems Manager, simplifies common maintenance and deployment tasks of Amazon Elastic Compute Cloud (Amazon EC2) instances and other AWS resources. Automation helps you to do the following: Build automations to configure and manage instances and AWS resources.
In this project we will be focusing on the how to stop a service in multiple Windows EC2 instances centrally from master account. Let’s get started.
Design Overview
AWS Systems Manager Automation supports multi-account and multi-Region actions enabling you to centrally manage your AWS resources. This feature reduces the time and overhead needed for enterprise-wide configuration, operational actions, and compliance remediation.
Implementation
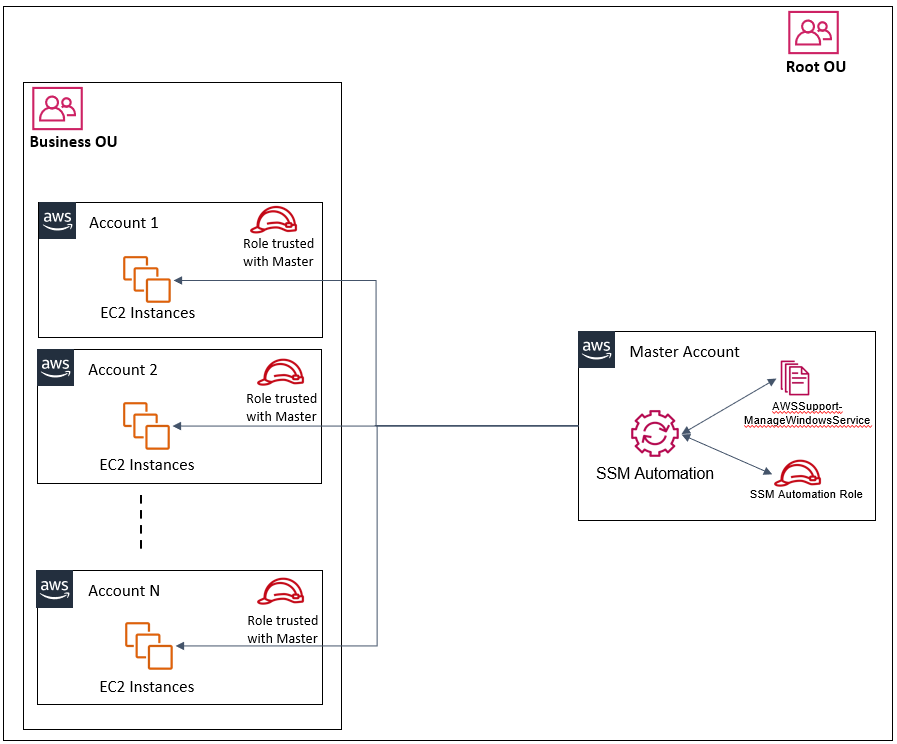
In this blog, I will walk through the below steps to set up your management account and target accounts for multi-account Automation tasks, here we will take print spooler as a service which we will stop in all Windows EC2 instances across the platform which are reporting to Systems manager
First you need to pick any one account as your management account and Region as your management Region. From this management location (management account and Region), you can execute Automation tasks targeting other AWS accounts and Regions.
Step 1 : Setup the IAM role in management/master AWS account
In the management account, provision the administrator automation IAM role, which can be created using the following AWS CloudFormation template available here in my Github repository- Clone the repo in your local
- Login to management account and go to CloudFormation service
- Create Stack by uploading the AWS-SystemManager-AutomationAdministrationRole.json template
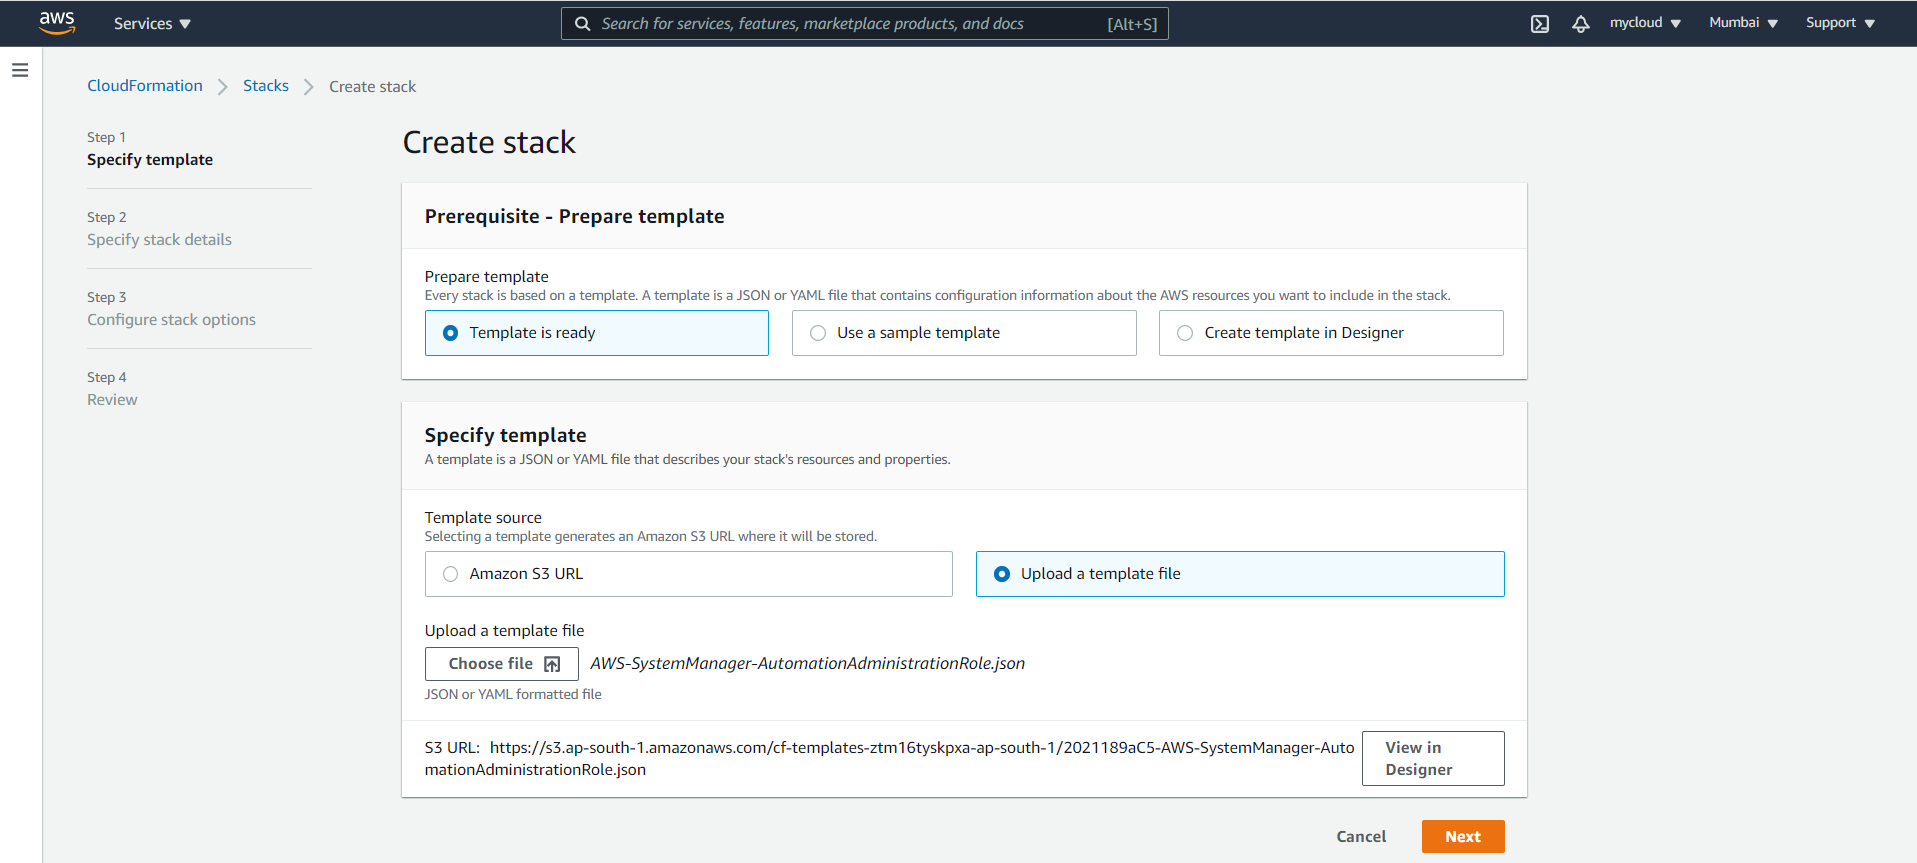
- Click Next and provide any readable name for the stack
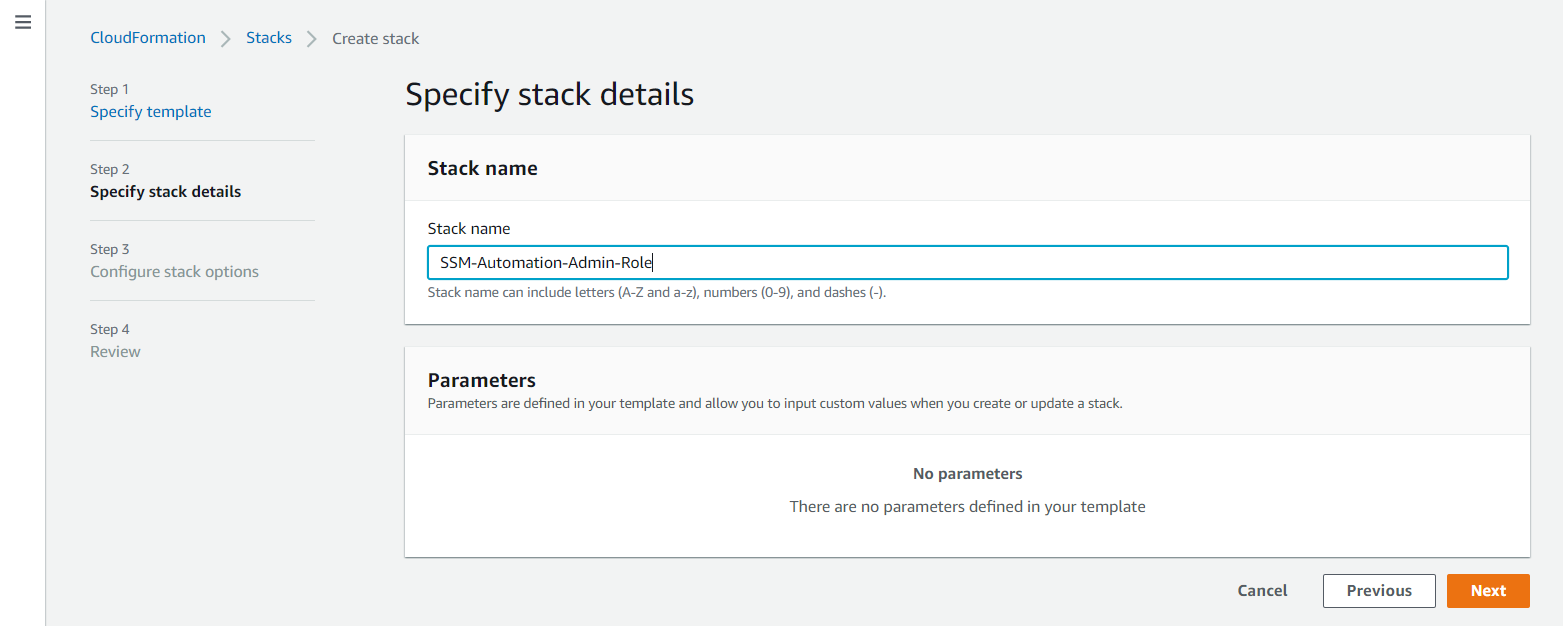
- Leave default in next page, considering the user you logged into the master account has previlege to create IAM role from CloudFormation
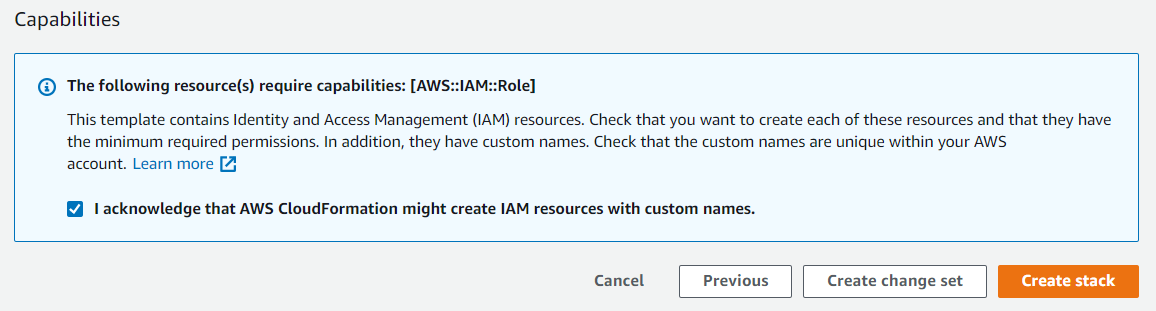
- Acknowledge IAM capabilities and click on create stack
- Validate the Stack completion
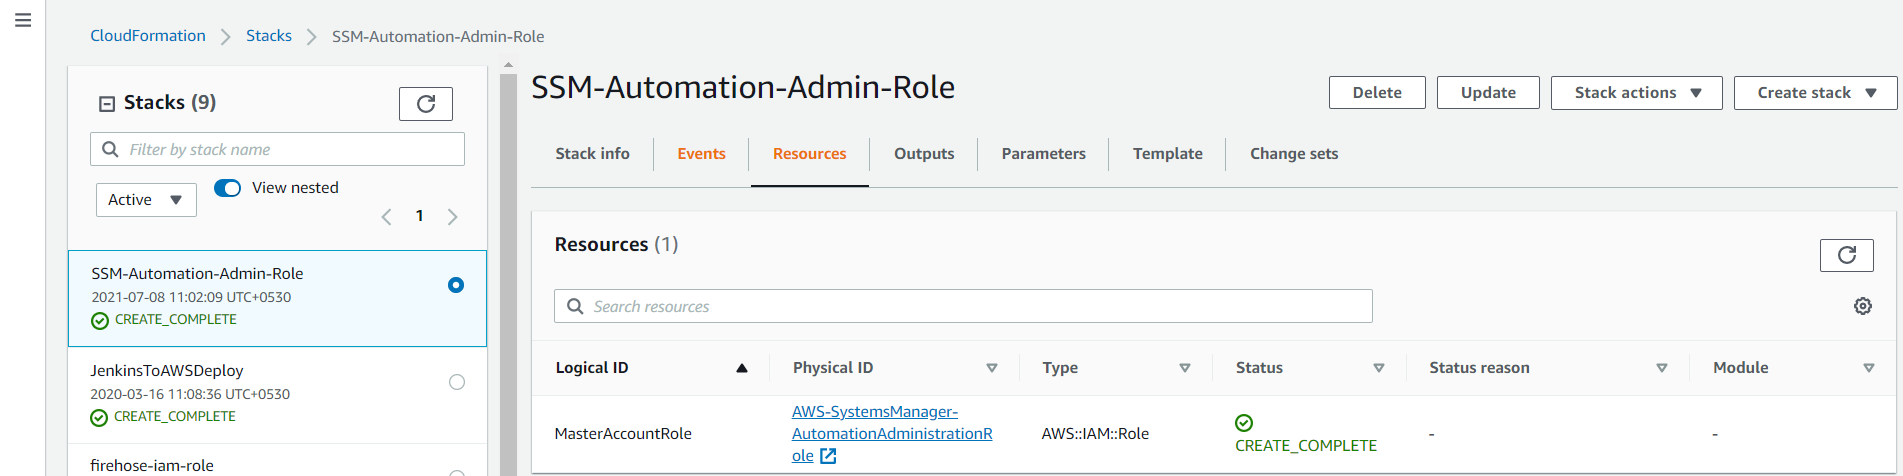
- Here is an example of the IAM policy that will be created in master account:
{"Version": "2012-10-17","Statement": [{"Action": ["sts:AssumeRole"],"Resource": "arn:aws:iam::*:role/AWS-SystemsManager-AutomationExecutionRole","Effect": "Allow"},{"Action": ["organizations:ListAccountsForParent"],"Resource": ["*"],"Effect": "Allow"}]}
Step 2 : Setup the IAM role in all member AWS accounts
Here we are going to deploy AWS-SystemsManager-AutomationExecutionRole.json role in all member accounts in an OU by deploying through stacksets. For more details on Stacksets, please refer official AWS document for stackset.
- Clone the repo in your local, template available here in my Github repository
- Login to management account and go to CloudFormation service
- Go to Stacksets and Create Stackset by uploading the AWS-SystemsManager-AutomationExecutionRole.json template

- Click Next and provide any readable name for the stackset and enter master account ID in the parameter

- Click Next and select the deployment Targets, Region (Any one region, since role is global) and Options as per your requirement and acknowledge for IAM capabilities and create the stackset
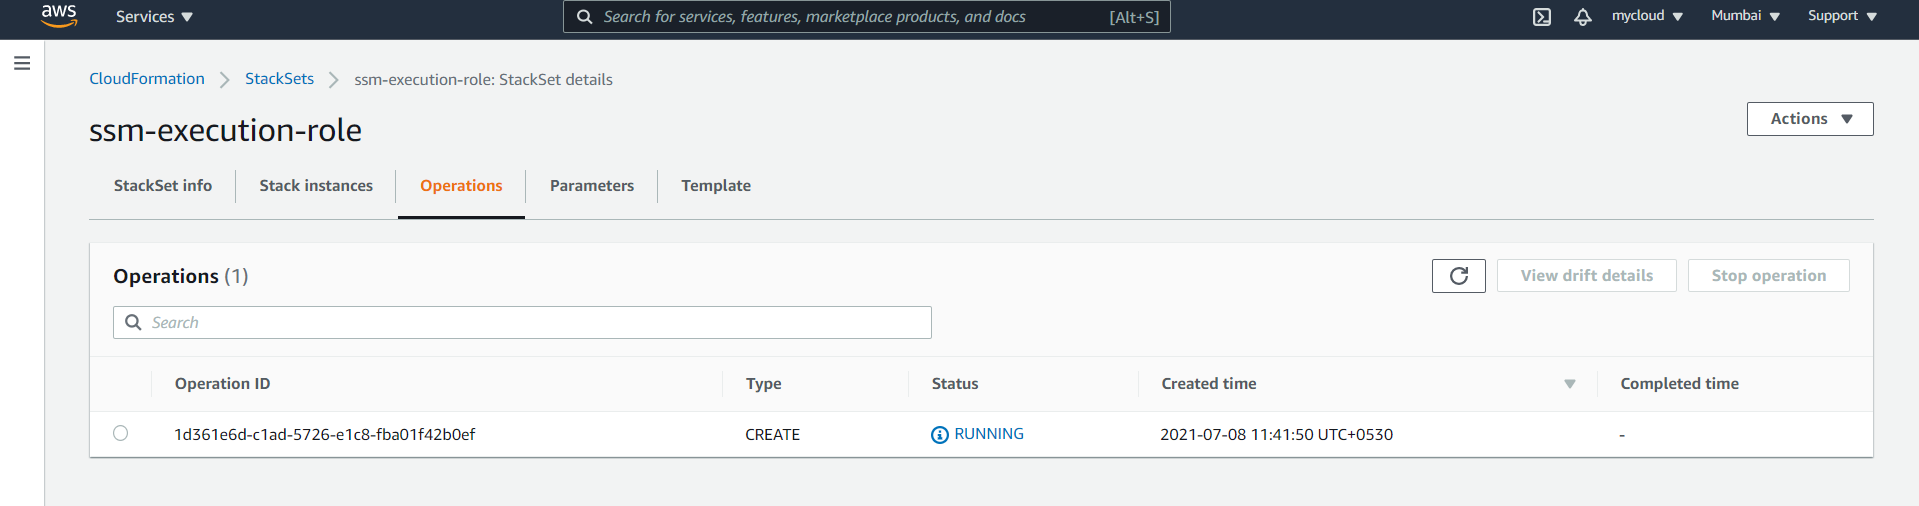
- Once Operation is complete, you can validate a role will be created across all the accounts
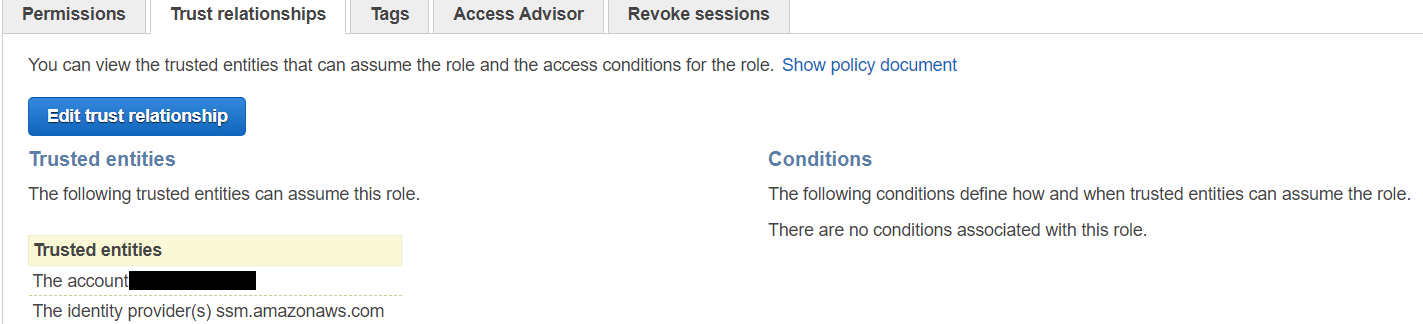
- Here is an example of the IAM policy that will be created in member accounts:
{"Version": "2012-10-17","Statement": [{"Action": ["ec2:*","ssm:*"],"Resource": "*","Effect": "Allow"},{"Action": ["iam:PassRole"],"Resource": "arn:aws:iam::60**********:role/AWS-SystemsManager-AutomationExecutionRole","Effect": "Allow"}]}
Step 3 : Execute Automation to stop a service in Windows for target accounts
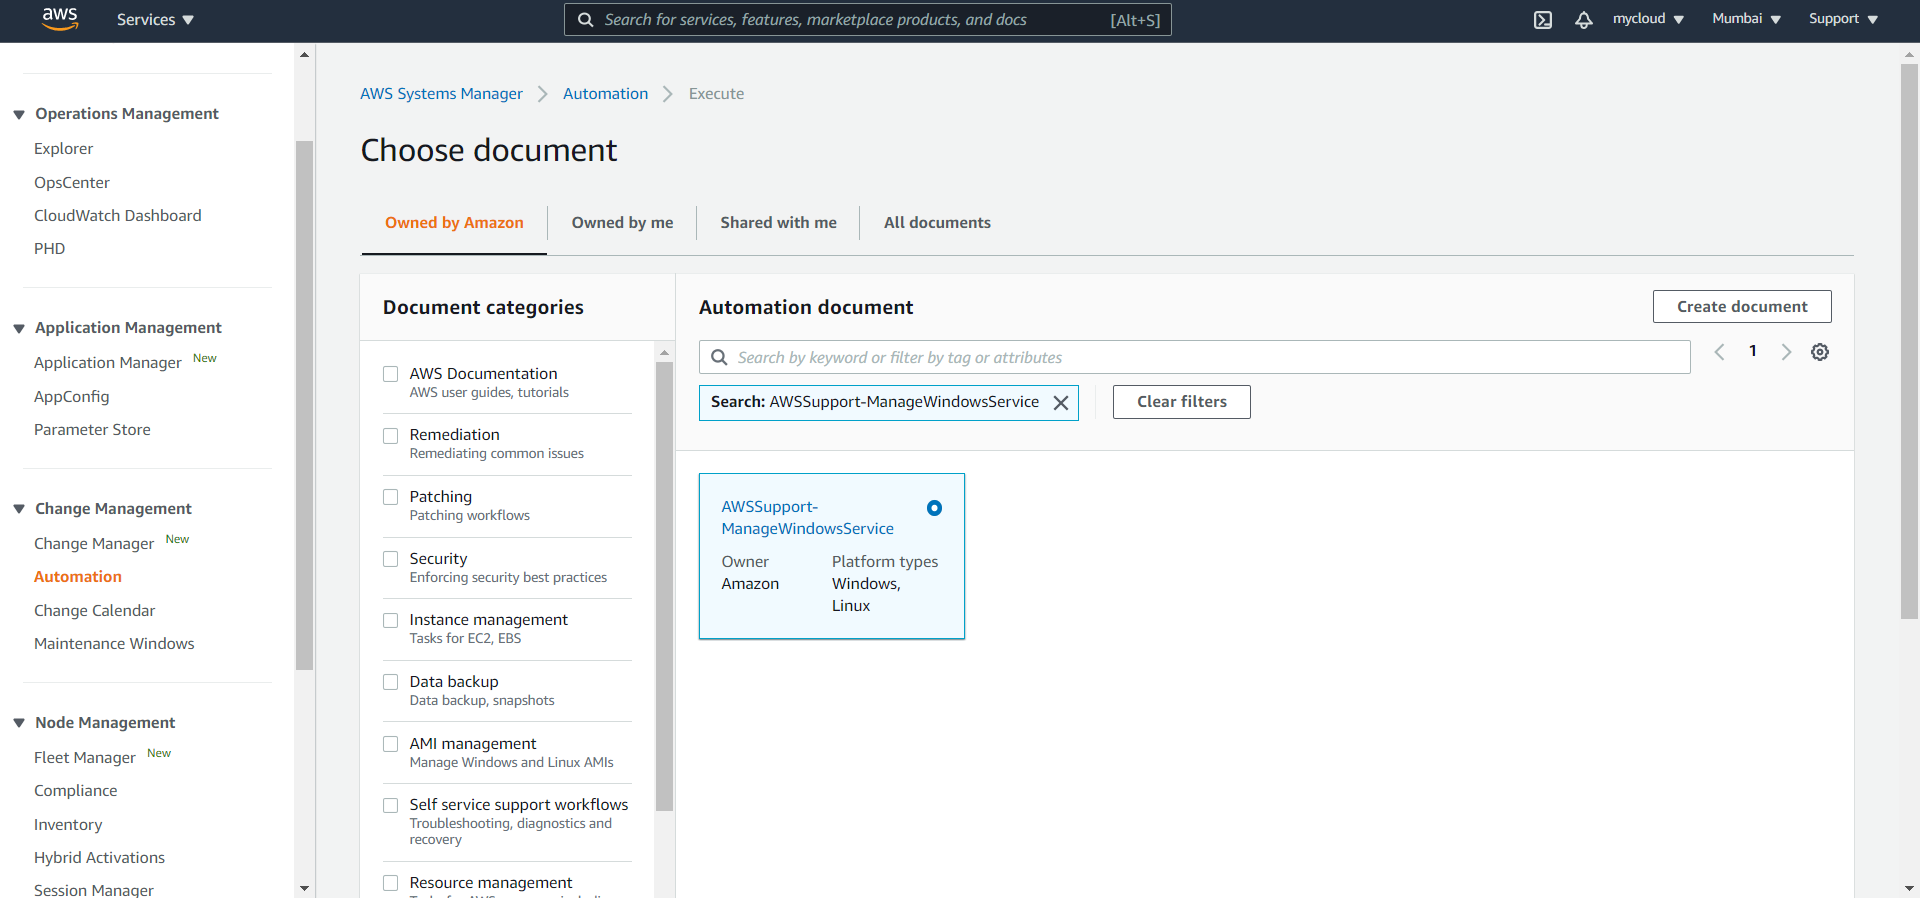
- In the management account, Go to AWS Systems Manager console, select Automation from the left navigation pane and filter for Document AWSSupport-ManageWindowsService and select the document and click Next
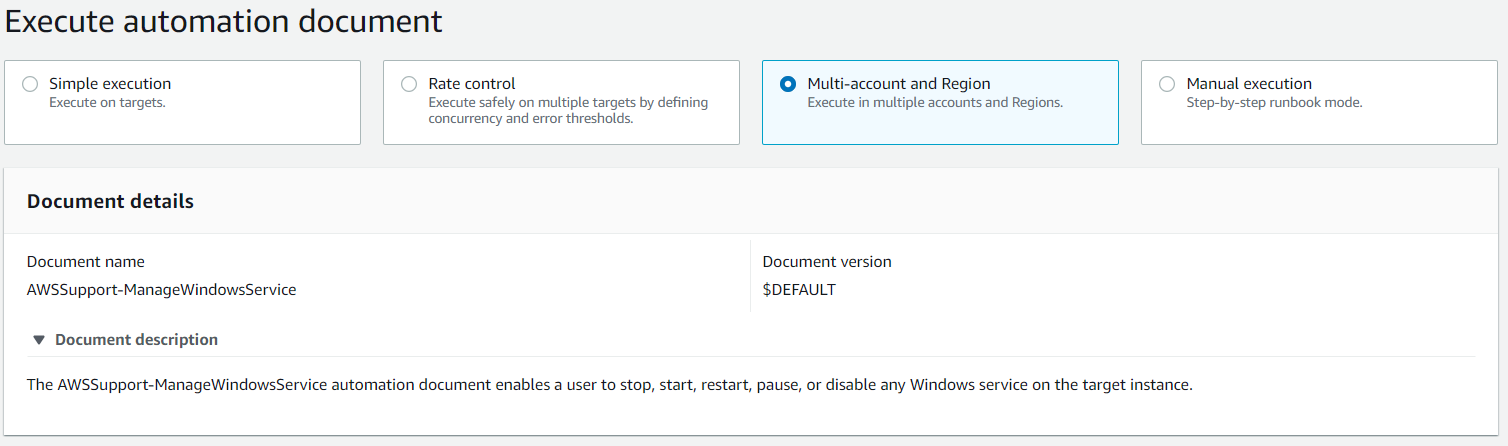
- Select Multi-account and Region
- Select the Target accounts and Regions as per your requirement

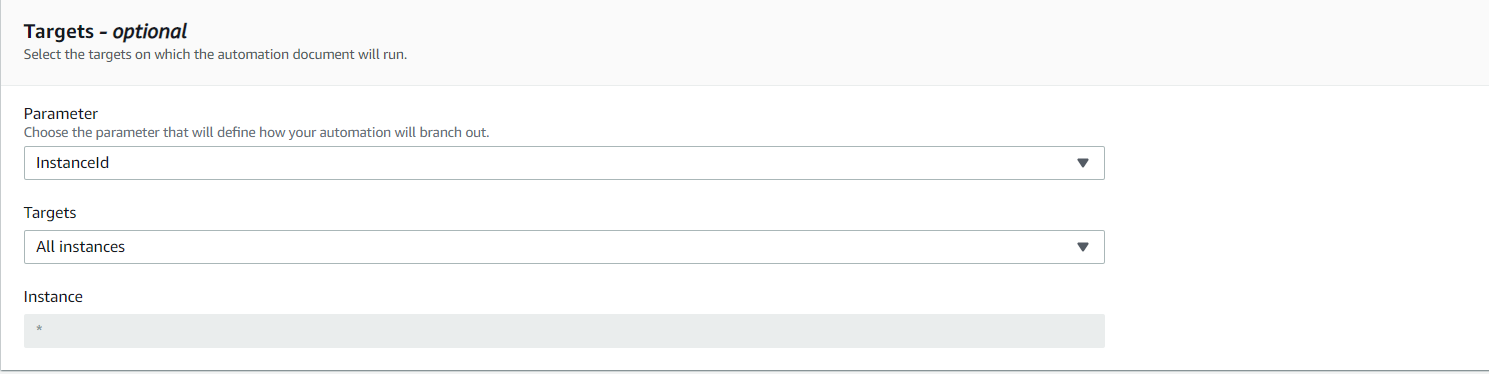
- Select Targets as shown below
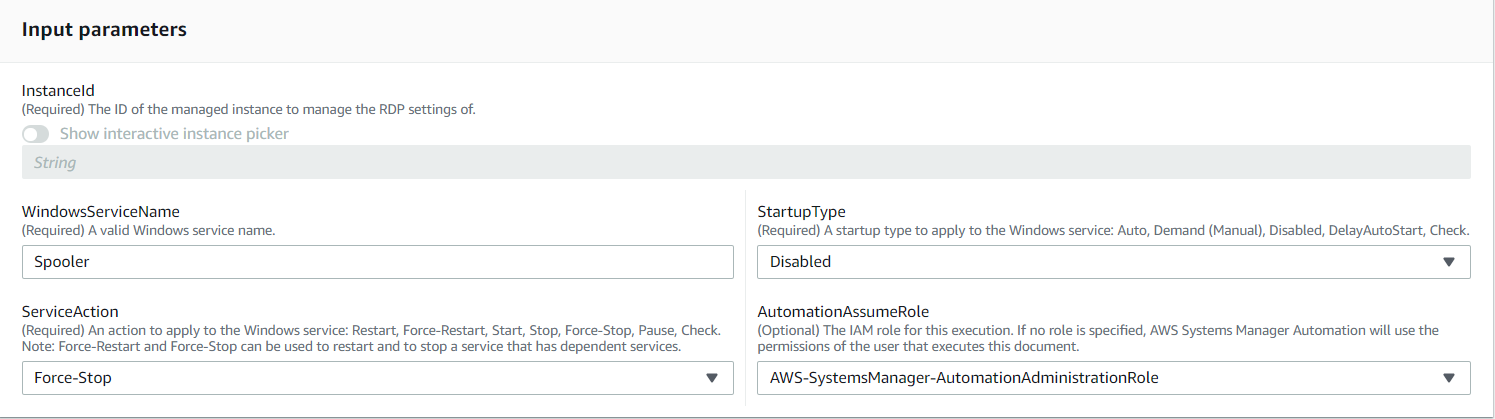
- Select Input Parameters, for this example I have taken Spooler service to stop and disable
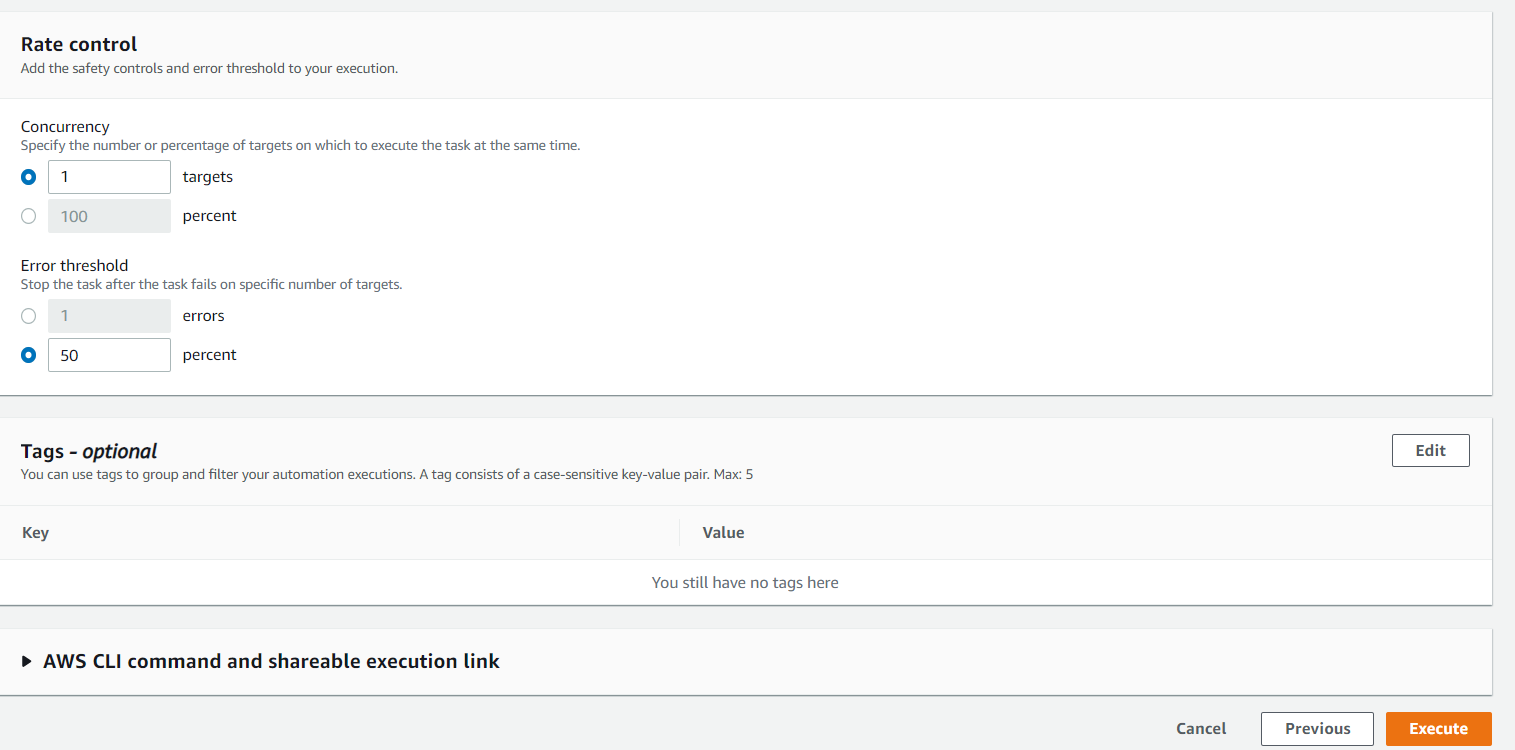
- Enter the Rate control and tags as per your requirement and execute the Automation
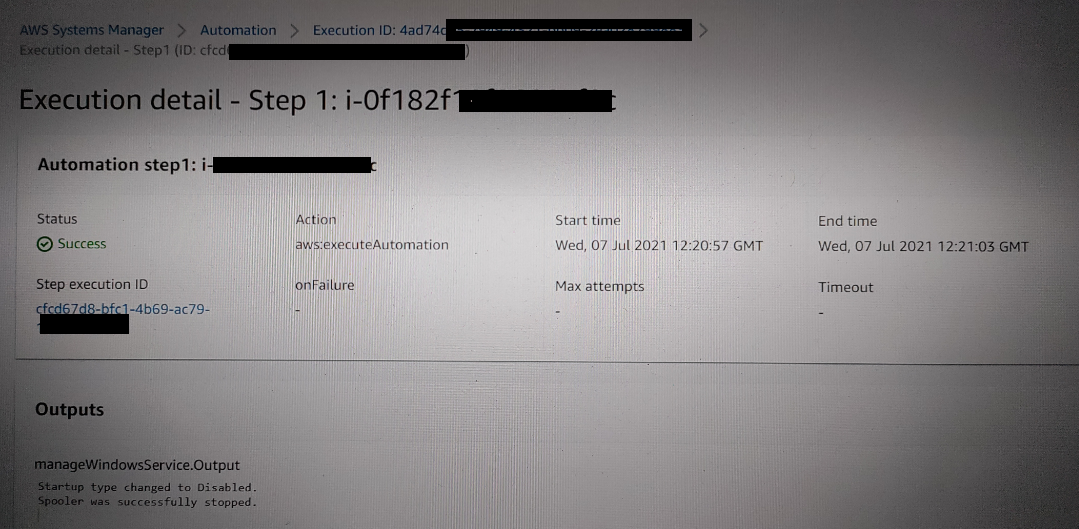
- You can view the execution results as below
Conclusion
In this blog post, I have shown you how to stop a service in AWS Systems Manager Managed Windows Instances across multiple AWS accounts using Automation. I started by showing you how to create the required IAM service roles used by Automation in the management and target accounts. Following this, I showed you how to execute AWSSupport-ManageWindowsService Document that targeted your managed instancesYou can customize your workflow further by using different Automation Document. For more details, Please refer official AWS SSM Automation Documents.
Comments
Post a Comment